(Debian Linux) Using a Canon EOS camera as a webcam with secure boot enabled
I recently started using my Canon EOS Rebel T6 DSLR camera as a webcam; Canon offers a utility for Windows and MacOS that allows this but not for Linux, so I needed to find a solution that would work when I’m using Debian.
Using a camera as a webcam in Debian is very straightforward, but if you want to have secure boot enabled then there are a few extra steps that you might need to take. The extra complexity comes from needing to sign the kernel modules for v4l2loopback, which is used to make the camera’s video stream available to webcams.
Most of the tutorials and posts I found online either didn’t mention having to sign the kernel module, or said to disable secure boot outright. This wasn’t an acceptable solution to me so I made this tutorial to provide a solution that lets the camera be used as a webcam while still keeping secure boot enabled. I was able to accomplish this on my ThinkPad X1 Extreme gen 3 running Debian GNU/Linux 11 (bullseye).
This solution should work for any camera compatible with gphoto2, including many cameras by Canon, Fuji, HP, Kodak, Nikon, Pentax, Sanyo, Sony, and many others.
Contents
- Installing dependencies
- Register the DKMS key to work with Secure Boot
- Manually sign the v4l2loopback kernel module
- Connecting the camera
- Using the camera in applications
- Conclusion
- References
Installing dependencies
To start off, you will need to install a few dependencies:
gphoto2gets the camera’s video streamffmpegconverts the camera’s video stream into a usable formatv4l2loopback-dkmsmakes the video stream available to applications as a virtual webcamv4l2loopback-utils(optional) adds a commandline utility for managing v4l2loopbacklinux-headers-$(uname -r)provides the infrastrucure we need for signing the v4l2 kernel modulesvlc(optional) gives us an easy way to preview the camera stream
You can install all of these at once using:
sudo apt install gphoto2 ffmpeg v4l2loopback-dkms v4l2loopback-utils linux-headers-$(uname -r) vlc
Register the DKMS key to work with Secure Boot
This step might be optional for you; you can check first by trying to setup the loopback device using:
sudo modprobe v4l2loopback card_label="Virtual Camera"
If the command runs with no errors then congratulations! You can skip this step and go directly to Connecting the camera to begin using the camera. If you get an error like modprobe: ERROR: could not insert 'v4l2loopback': Operation not permitted then you will need to ensure that the module for v4l2loopback is signed with a key registered to work with your machine's secure boot so that it will be allowed to run.
You can do this either by registering the default key used to sign the module (easier) or by generating your own key to sign the module with (in which case skip to the next step).
The process to register the default key is fairly straightforward and is well-documented in the Debian Wiki. First run the command to register the default key:
sudo mokutil --import /var/lib/dkms/mok.pub
This should prompt you for a password, which will be needed in a minute. For now enter a password that you will remember, you will only need it once as it's used to confirm the key registration the next time you reboot the machine.
If the key doesn't exist at that location, you can check the dkms config file to find the correct public key path (look for the mok_certificate entry in /etc/dkms/framework.conf).
Confirm that they key is marked to be registered by running:
sudo mokutil --list-new
Reboot the machine, which will enter the MOK manager EFI utility. From there select the option to enroll MOK, continue, confirm, enter password, and reboot. You can then confirm whether your key is successfully loaded using:
sudo dmesg | grep cert # verify your key is loaded
You should now be able to skip ahead to connecting the camera
Manually sign the v4l2loopback kernel module
If you need the v4l2loopback kernel module signed but don't want to register the default key with your machine's secure boot mechanism, then you can create your own key to sign the module with. This requires more work when you upgrade the package but may be more secure.
The Debian documentation provides a guide for signing kernel modules with your own key, which we will follow to sign our v4l2loopback module.
Generating a Machine Owner Key
The first step is to generate a Machine Owner Key to allow you to sign modules. You can check whether a key already exists by running:
ls /var/lib/shim-signed/mok
A key consists of the files MOK.der, MOK.pem, and MOK.priv and if you see them there then you can skip this step and use the existing key.
To generate a new key run the following commands from a root shell (using su or similar):
mkdir -p /var/lib/shim-signed/mok/  # Ensures that the key directory exists
cd /var/lib/shim-signed/mok/  # Switches to the key directory
openssl req -new -x509 -newkey rsa:2048 -keyout MOK.priv -outform DER -out MOK.der -days 36500 -subj "/CN=Your Name/"  # Generates the private key and a public key in the DER format
openssl x509 -inform der -in MOK.der -out MOK.pem  # Converts the public key to PEM format
Enrolling your key
From the /var/lib/shim-signed/mok directory, use the following commands to enroll your key with the EFI:
sudo mokutil --import MOK.der # prompts for one-time password
sudo mokutil --list-new # recheck your key will be prompted on next boot
Reboot the machine, which will enter the MOK manager EFI utility. From there select the option to enroll MOK, continue, confirm, enter password, and reboot. You can then confirm whether your key is successfully loaded using:
sudo dmesg | grep cert # verify your key is loaded
Signing the module
First set up environment variables that we will use for the signing with:
VERSION="$(uname -r)"
SHORT_VERSION="$(uname -r | cut -d . -f 1-2)"
MODULES_DIR=/lib/modules/$VERSION
KBUILD_DIR=/usr/lib/linux-kbuild-$SHORT_VERSION
Then sign the v4l2loopback module with:
cd "$MODULES_DIR/updates/dkms"  # Change to the directory where the module is stored
echo -n "Passphrase for the private key: "  # Give us a friendly password prompt
read -s KBUILD_SIGN_PIN  # Store the passphrase for the private key
export KBUILD_SIGN_PIN  # Export the variable containing the password
sudo --preserve-env=KBUILD_SIGN_PIN "$KBUILD_DIR"/scripts/sign-file sha256 /var/lib/shim-signed/mok/MOK.priv /var/lib/shim-signed/mok/MOK.der v4l2loopback.ko
You can then verify that the module is signed using:
sudo modinfo v4l2loopback
which should show a signature now attached to the module. You may need to repeat the signing step if v4l2loopback is updated (e.g. through an apt upgrade) so I would recommend saving these instructions somewhere easy to find or bookmarking this page so you can reference it later if needed.
Alternatively, you can save the commands you need as a script and then run the script after any updates that replace your signed modules. I have a few different packages that need their modules signed, so I created a script that signs all modules in the dkms modules directory.
Connecting the camera
Connect your camera to your computer using the USB cable, turn the camera on, and then run the following command to ensure it connected successfully:
LANG=C gphoto2 --summary
This should show you output similar to this, confirming that your camera is connected and available:
Camera summary:
Manufacturer: Canon Inc.
Model: Canon EOS Rebel T6
Version: 3-1.2.0
Serial Number: xxxxxxxxxxxxxxxxxxxxxxxxxxxxxxxx
Vendor Extension ID: 0xb (1.0)
Vendor Extension Description:

Capture Formats: JPEG
Display Formats: Association/Directory, Script, DPOF, MS AVI, MS Wave, JPEG, CRW, Unknown(b103), Unknown(bf02)
, Defined Type, Unknown(b104), Unknown(b105)

Device Capabilities:
    File Download, File Deletion, File Upload
    No Image Capture, No Open Capture, Canon EOS Capture, Canon EOS Capture 2
    Canon Wifi support

Storage Devices Summary:
store_00020001:
    StorageDescription: SD
    VolumeLabel:
    Storage Type: Removable RAM (memory card)
    Filesystemtype: Digital Camera Layout (DCIM)
    Access Capability: Read-Write
    Maximum Capability: 31902400512 (30424 MB)
    Free Space (Bytes): 2837151744 (2705 MB)
    Free Space (Images): -1

Device Property Summary:
Property 0xd402:(read only) (type=0xffff) 'Canon EOS Rebel T6'
Property 0xd407:(read only) (type=0x6) 1
Property 0xd406:(readwrite) (type=0xffff) 'Unknown Initiator'
Property 0xd303:(read only) (type=0x2) 1
Battery Level(0x5001):(read only) (type=0x2) Enumeration [100,0,75,0,50] value: 100% (100)
If you instead get a message saying *** Error: No camera found. ***, make sure your camera is connected and that wifi/bluetooth is disabled in your camera’s settings. You may also need to unmount the camera so that gphoto2 can claim the connection if the camera’s storage was mounted automatically.
You will now need to setup the virtual camera, which you will need to do exactly once each time that you boot your computer:
sudo modprobe v4l2loopback card_label="Virtual Camera"
Next get the name of the virtual camera using ls /dev/video*, the virtual camera should be the one with the largest number, in my case it is /dev/video4, which I will be using for the rest of the instructions. You can also manually set the number of the camera when you setup the virtual camera using:
sudo modprobe v4l2loopback card_label="Virtual Camera" video_nr=4
Finally, connect to the camera’s video stream using:
gphoto2 --stdout --capture-movie | ffmpeg -i - -vcodec rawvideo -pix_fmt yuv420p -threads 0 -f v4l2 /dev/video4
This will use gphoto2 to capture the camera’s video stream, forward it to ffmpeg which will convert it to a usable format, and finally pass it into our virtual camera which will make it available to any applications that use the webcam.
You can easily check whether this is all working properly by opening a new shell prompt (our current one will be busy handling the video stream) and using it to open vlc connected to our virtual camera:
vlc v4l2:///dev/video4
Using the camera in applications
Now that your camera is connected and streaming through the virtual camera, you should be able to use it in any application that supports webcams simply by selecting it. For example, I am able to use it in Zoom and Firefox. Example of the virtual camera in the settings of the Zoom videoconferencing application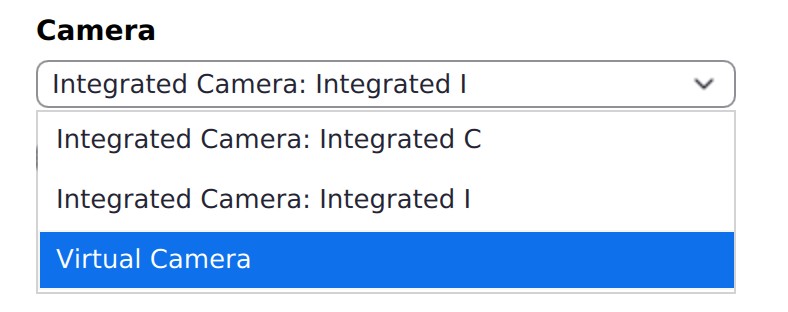
Conclusion
We have gone through how to use a Canon EOS camera as a webcam in Debian Linux using gphoto, ffmpeg, and v4l2loopback, while keeping secure boot enabled.
You can easily save the commands that you will need to repeat by adding aliases to your ~/.bashrc file. For instance, I have the following in mine to let me easily manage the webcam (keep in mind that my virtual camera is at /dev/video4 and you may need to substitute the 4 for another number on your machine):
# For connecting DSLR as webcam
alias setup_camera='if [ -e "/dev/video4" ]; then echo "Camera is already setup"; else sudo modprobe v4l2loopback card_label="Virtual Camera" video_nr=4; fi'
alias test_camera="LANG=C gphoto2 --summary"
alias connect_camera="gphoto2 --stdout --capture-movie | ffmpeg -i - -vcodec rawvideo -pix_fmt yuv420p -threads 0 -f v4l2 /dev/video4"
alias preview_camera="vlc v4l2:///dev/video4"
You can also setup the virtual camera to be created at boot by creating the following 2 files:
/etc/modules-load.d/v4l2loopback.conf
v4l2loopback
/etc/modprobe.d/v4l2loopback.conf
options v4l2loopback video_nr=4
options v4l2loopback card_label="Virtual Camera"
If you run into issues with your camera not working, ensure that it is plugged in and turned on, that wifi is disabled in the settings, and that the gphoto2 command is running. Also double-check that the v4l2loopback kernel module is correctly signed and that the virtual camera exists.
